In the dynamic world of videography, smooth and captivating camera movement is the hallmark of professional storytelling. Gone are the days when elaborate dollies and jibs were the only way to achieve fluid shots. Today, the camera stabilizer, particularly the gimbal, has revolutionized how videographers capture cinematic footage, making sophisticated camera moves accessible to everyone. But simply owning a gimbal isn’t enough; mastering the techniques to harness its full potential is what truly transforms your work.
Whether you’re a seasoned filmmaker or an aspiring content creator, integrating cinematic gimbal moves into your repertoire can dramatically elevate your videos. This guide will walk you through 10 essential gimbal techniques that professional videographers use to create stunning, engaging narratives, offering practical advice to help you achieve buttery-smooth, visually rich results every time.
Why Mastering Gimbal Moves Elevates Your Videography
Gimbals provide a stable platform for your camera, counteracting unwanted shakes and vibrations, which is a game-changer for video quality. While handheld footage can offer a raw, immediate feel, cinematic videography often demands a polished, controlled aesthetic. Mastering specific gimbal moves allows you to tell stories with purposeful motion, guiding your audience’s eye and adding an emotional layer that static shots simply cannot. This mastery transitions your work from amateur to professional, opening up a world of creative possibilities.
Dynamic camera movement enhances visual engagement, helping to establish settings, build tension, reveal characters, and drive the narrative forward. By controlling how the camera moves through a scene, you effectively control the viewer’s experience, making them feel more immersed in the story unfolding before them.
Essential Preparation: Setting Up Your Gimbal for Success
Before diving into complex moves, proper gimbal setup is paramount. A poorly balanced gimbal or an unfamiliarity with its operating modes will inevitably lead to frustrating, subpar results. Think of it as tuning an instrument before a performance – precision here ensures a flawless execution later.
Balancing Your Gimbal: The Crucial First Step
|
Our Picks for the Best Camera Stabilizer in 2026
As an Amazon Associate I earn from qualifying purchases.
|
||
| Num | Product | Action |
|---|---|---|
| 1 | 3-Shoe DSLR/Mirrorless/Action Camera Camcorder Phone Stabilizer Expansion Cage Mount Moviemaking Holder Rig YouTube Tiktok Vlogging Video Kit Compatible with GoPro Canon Nikon Sony iPhone Android |

|
| 2 | FeiyuTech SCORP 2 Gimbal Stabilizer for DSLR and Mirrorless Camera, Integrated Al Tracking Sensor, 3-Axis Camera Stabilizer for Sony Canon Panasonic Nikon, 2.5kg Payload Touch Screen Vertical Shooting |
|
| 3 | FeiyuTech SCORP 3 Gimbal Stabilizer for Camera, Built-in AI Tracking Sensor & Detachable Remote Control, 3.5KG Payload Camera Stabilizer with Touch Screen, Vertical Shooting |
|
| 4 | DJI Osmo Mobile 7P Gimbal Stabilizer for iPhone, Android, Native Tracking, Lighting, 3-Axis Phone Gimbal, Quick Launch, One-Tap Edit, Built-in Extension Rod & Tripod, 10hrs Use, Phone Charging |
|
| 5 | DJI RS 3 Mini, 3-Axis Gimbal Stabilizer for Cameras Canon/Sony/Panasonic/Nikon/Fujifilm, 2 kg (4.4 lbs) Tested Payload, Camera Gimbal with Native Vertical Shooting, Black |
|
| 6 | DJI Osmo Mobile 8 Advanced Tracking Combo Gimbal Stabilizer for Phone, AI Native Tracking with Audio & Lighting, 360° Pan Rotation, Built-in Extension Rod & Tripod, 10h Battery, Extension Rod |
|
| 7 | Zeadio Video Action Stabilizing Handle Grip Handheld Stabilizer with Cold-Shoe Mount for All DSLR Camera Camcorder |
|
| 8 | DJI Osmo Mobile 7 Gimbal Stabilizer for iPhone, Android, Built-in Tripod, Portable Stabilizer for iPhone, Selfie Stick, 3-Axis Phone Gimbal, ActiveTrack 7.0, One-Tap Edit, 10hrs Use, Phone Charging |
|
| 9 | ZHIYUN CINEPEER Weebill 3E [Official], 3-Axis Lightweight Gimbal Stabilizer for DSLR & Mirrorless Camera Canon/Sony/Panasonic/Nikon, 3KG Payload, Native Vertical Shooting, Bluetooth Shutter Control |
|
| 10 |
|
|
Proper balancing is the single most critical step for achieving smooth gimbal footage and preventing motor strain. Each axis (pan, tilt, and roll) must be perfectly balanced, ensuring the camera remains level even when the gimbal is powered off. Start by mounting your camera, lens, and all accessories (microphones, monitors) that will be used during shooting. Then, adjust each axis until the camera holds its position without assistance. Many modern gimbals offer auto-tune functions, which fine-tune motor strength once manual balancing is complete. This attention to detail ensures optimal performance and extends the life of your equipment.
Understanding Gimbal Modes and Controls
Modern gimbals come equipped with various operating modes, each designed for specific types of shots. Common modes include:
- Pan Follow Mode (PF): The camera only follows your horizontal (pan) movements, keeping the tilt and roll axes locked. Ideal for tracking subjects horizontally.
- Tilt Lock Mode (TL): The camera’s tilt remains locked, but it can pan and roll. Useful for low-angle shots or keeping the horizon level while moving.
- All-Lock Mode (AL): All three axes are locked, keeping the camera pointed in a fixed direction regardless of gimbal movement. Great for “push-in” or “pull-out” shots.
- POV (Point of View) Mode: The camera follows all three axes of your movement, offering a dynamic, immersive perspective.
- Sport Mode/Fast Follow: Increases motor responsiveness for quick movements, perfect for fast-paced action.
Familiarize yourself with your gimbal’s joystick and customizable buttons. These controls allow for precise camera adjustments during a shot, which is essential for executing cinematic moves with finesse.
Top 10 Cinematic Gimbal Moves to Master
Here are 10 indispensable gimbal moves that will add professional polish and dynamic flair to your videography.
1. The Classic Push-In/Pull-Out
This fundamental move mimics the classic dolly shot, creating a sense of intimacy or vastness. A push-in involves steadily moving the gimbal forward towards your subject, drawing the viewer deeper into the scene or emphasizing a detail. It can build anticipation or highlight a character’s reaction. Conversely, a pull-out involves moving backward, expanding the frame to reveal the environment or a larger context, often used for establishing shots or concluding a scene. For both, maintaining a consistent speed and keeping your subject centered (or positioned according to the rule of thirds) is key to a smooth, professional feel.
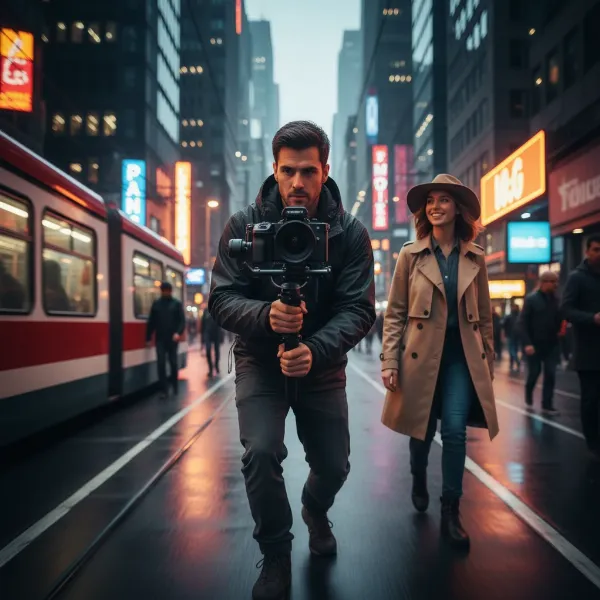 A videographer performing a smooth push-in gimbal move towards a subject in a vibrant city setting, emphasizing cinematic depth.
2. The Orbit/360-Degree Reveal
The orbit shot involves circling your subject, keeping them in the center of the frame as the background rotates around them. This move creates a dynamic sense of immersion and can reveal intricate details of a character or environment. It’s particularly effective when shot with a wide-angle lens to exaggerate the parallax effect, making the background appear to move faster than the subject. When executing, maintain a consistent distance from your subject and ensure your camera remains locked onto them.
3. The Dynamic Follow Shot
A staple in cinematic storytelling, the follow shot keeps the camera trailing directly behind a moving subject. This creates an immediate connection between the viewer and the character, drawing them into the action. To execute effectively, maintain a consistent distance and speed relative to your subject. This technique is excellent for long, continuous takes, conveying a sense of journey or purpose. Variations include the lead track (camera in front) and side track (camera alongside), each offering a different perspective and emotional tone.
4. The Grand Crane/Jib Shot
Often associated with large-scale productions, the crane or jib shot involves vertical camera movement, starting low and smoothly rising (or vice-versa). With a gimbal, this can be achieved by extending the gimbal overhead or using an extension pole. It’s a powerful way to establish a grand location, reveal a subject from above, or create a dramatic sense of scale. Begin with the camera low, close to the ground, and slowly lift it while maintaining a steady vertical path. Some gimbals even offer programmable vertical movements, simplifying this impressive shot.
5. The Dramatic Low-Angle Tracking Shot
Flipping your gimbal into underslung (low) mode allows you to capture footage from a unique, ground-level perspective. This shot makes subjects appear larger and more powerful, adding a dramatic or mysterious tone. It’s perfect for tracking feet, pets, or objects low to the ground, or for creating an intense, immersive feel during action sequences. Ensure your knees are bent and you maintain a smooth, controlled stride to avoid unwanted vertical bobbing.
6. The Smooth Side Tracking Shot
Similar to the follow shot, the side tracking shot involves moving the camera parallel to your subject, keeping them in frame as they traverse the scene. This move provides a broader view of the environment while still maintaining focus on the subject. It’s often used to show interaction with the surroundings or to highlight a subject’s journey through a space. Positioning your subject off-center, according to the rule of thirds, can enhance the visual appeal and create a more balanced composition.
7. The Enticing Reveal Shot
The reveal shot uses a foreground object or obstruction to dramatically unveil your subject or a new scene. Begin with the camera focused on an object (a wall, a tree, a doorway), then smoothly move the gimbal past it to reveal what lies beyond. This technique is excellent for transitions, adding intrigue, or introducing a location with a sense of discovery. The key is to make the transition seamless, guiding the viewer’s eye from the obstruction to the revelation.
8. The Vertical Tilt (Up & Down)
This straightforward yet effective move involves smoothly tilting your camera up or down using the gimbal’s joystick. A tilt-up can slowly reveal a character’s face, a tall building, or a vast sky, building suspense or offering a sense of wonder. A tilt-down can direct attention from a broad view to a specific detail on the ground, such as an object or a character’s feet. Combining tilts with push-in or pull-out movements can create even more dynamic and complex shots, adding depth and narrative flow.
9. The Subtle Parallax Shot
While often associated with orbiting, the parallax effect can also be achieved more subtly. By moving the camera horizontally or vertically while keeping a fixed point of interest, foreground and background elements appear to move at different speeds, creating a sense of depth and dimension. This move makes your subject stand out and adds visual richness to otherwise simple tracking shots. Experiment with different distances to your subject and background to find the most effective parallax.
10. The Focus Reveal
The focus reveal is a powerful technique to draw attention to a specific subject or detail. Start your shot with the foreground or background intentionally out of focus, then smoothly adjust your camera’s focus to bring your desired subject into sharp clarity. This can be done by physically moving closer or further away from the subject, or by using a follow focus system if your gimbal supports it. This shot builds anticipation and directs the viewer’s eye with precision, adding an artistic touch to your cinematic sequences.
Pro Tips for Executing Flawless Gimbal Shots
Beyond mastering individual moves, certain universal techniques will ensure your gimbal footage always looks professional and polished.
The “Ninja Walk” and Two-Handed Grip
A common challenge with gimbals is the slight up-and-down motion that can occur from walking naturally, as most 3-axis gimbals don’t stabilize the vertical axis. The “ninja walk” or “Gimbal Glide” technique helps mitigate this: bend your knees, walk heel-to-toe, and keep your core stable to minimize vertical bounce. Additionally, always hold your gimbal with two hands for maximum stability. One hand controls the gimbal, while the other supports its weight, leading to significantly smoother movements and less fatigue during longer shoots.
> “Mastering the ‘ninja walk’ is just as crucial as balancing your gimbal. It’s the silent foundation of truly cinematic movement, ensuring every step translates into fluid, professional footage.” – Alex Chen, Professional Videographer & Stabilizer Expert
Strategic Use of Foreground and Background
Effective use of foreground and background elements can dramatically enhance the perceived motion and depth of your gimbal shots. Moving past objects in the foreground (like trees, pillars, or doorways) during a tracking or push-in shot creates a strong sense of speed and dimension, making the shot feel more dynamic. Similarly, a busy or detailed background during an orbit shot will emphasize the parallax effect, adding visual interest. Always be mindful of your environment and how it can contribute to the overall impact of your shot.
Practice and Experimentation
Like any skill, mastering cinematic gimbal moves requires practice. Dedicate time to running drills, focusing on smooth starts and stops, consistent speed, and precise framing. Don’t be afraid to experiment with combinations of moves, different camera settings, and varying distances to your subject. Watch professional films and analyze how camera movement is used to tell stories. The more you practice, the more intuitive these movements will become, allowing you to focus on the creative aspects of your filmmaking. Many gimbals also have smart features like ActiveTrack or panorama modes that can help automate certain complex movements, freeing you to focus on composition.
Conclusion: Unleash Your Cinematic Vision
Integrating these 10 cinematic gimbal moves into your videography toolkit will fundamentally transform the quality and impact of your work. From the dramatic push-in to the immersive orbit, each technique offers a unique way to tell your story with unparalleled fluidity and visual appeal. Remember that while the gimbal is a powerful tool, it’s your understanding and execution of these moves that truly brings your cinematic vision to life. Practice consistently, experiment boldly, and always strive for purposeful motion in your storytelling. What cinematic stories will you tell next with your newfound gimbal mastery?
Frequently Asked Questions
What is the most important tip for smooth gimbal footage?
The most important tip for smooth gimbal footage is to master the “ninja walk” – bending your knees and moving slowly and deliberately to minimize vertical camera bounce. Coupled with proper gimbal balancing, this technique is crucial for professional-looking shots, as typical 3-axis gimbals do not stabilize vertical movement.
Can I achieve these cinematic moves with any camera stabilizer?
While the term “gimbal” is used broadly, these moves are primarily designed for electronic 3-axis gimbals. Steadicams and other stabilizers operate differently and have their own unique techniques. Ensure your equipment is an electronic gimbal for optimal execution of the moves described.
How do I practice gimbal moves without a subject?
You can practice gimbal moves effectively without a live subject by using static objects or landmarks. Focus on maintaining smooth movement, consistent speed, and precise framing as you perform push-ins, orbits around a pillar, or jib shots around a tree. This helps build muscle memory and control.