Stepping into the realm of low-angle photography can transform your visual storytelling, offering viewers a fresh, often dramatic, perspective on the world. From making subjects appear heroic and towering to revealing intricate details of a ground-level ecosystem, the power of a low vantage point is undeniable. Yet, for many photographers, capturing these stunning shots often comes with a physical cost: strained backs, sore knees, and uncomfortable contortions. But what if you could unlock the creative potential of low angles without the physical pain? This comprehensive guide will equip you with smart gear choices and innovative techniques to comfortably capture breathtaking low-angle photographs, keeping your focus on the shot, not your discomfort.
The Power of Low-Angle Photography: Why Go Low?
Low-angle photography fundamentally alters how a scene is perceived, presenting subjects from below eye level. This unique viewpoint naturally imbues subjects with a sense of grandeur, dominance, or even vulnerability, depending on the context. A towering skyscraper appears to pierce the clouds, a child playing on the ground becomes a monumental figure in their own world, and ordinary objects can take on an extraordinary presence. By shifting your perspective, you create a powerful visual narrative that adds drama, scale, and emotional depth, transforming mundane scenes into captivating imagery. It’s an invitation to see the familiar through an entirely new lens, quite literally.
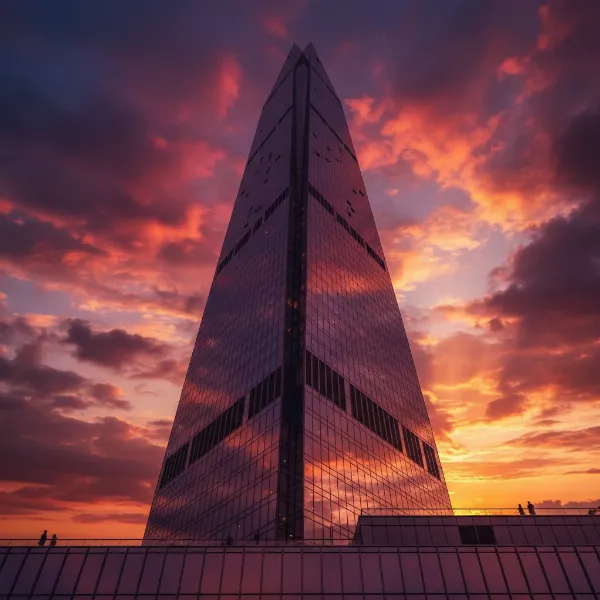 A dramatic low-angle shot of a towering skyscraper piercing the clouds at sunset.
Essential Gear for Comfortable Low-Angle Shooting
Achieving those coveted low-angle shots comfortably often boils down to having the right tools. Investing in specific accessories can significantly reduce physical strain, allowing you to focus on composition and creativity.
Articulating and Tilting LCD Screens
|
Our Picks for the Best Camera Stabilizer in 2026
As an Amazon Associate I earn from qualifying purchases.
|
||
| Num | Product | Action |
|---|---|---|
| 1 | FeiyuTech SCORP 3 Gimbal Stabilizer for Camera, Built-in AI Tracking Sensor & Detachable Remote Control, 3.5KG Payload Camera Stabilizer with Touch Screen, Vertical Shooting |

|
| 2 | ZHIYUN CINEPEER Weebill 3E [Official], 3-Axis Lightweight Gimbal Stabilizer for DSLR & Mirrorless Camera Canon/Sony/Panasonic/Nikon, 3KG Payload, Native Vertical Shooting, Bluetooth Shutter Control |
|
| 3 | Zeadio Camera Stabilizer Kit, All-in-One Handheld Stabilizer with LED Video Light, Microphone, Phone Holder & Action Camera adaper, Fits for All Camera, DSLR, Action Camera and All Smartphones |
|
| 4 | DJI Osmo Mobile 7P Gimbal Stabilizer for iPhone, Android, Native Tracking, Lighting, 3-Axis Phone Gimbal, Quick Launch, One-Tap Edit, Built-in Extension Rod & Tripod, 10hrs Use, Phone Charging |
|
| 5 | DJI Osmo Mobile 7 Gimbal Stabilizer for iPhone, Android, Built-in Tripod, Portable Stabilizer for iPhone, Selfie Stick, 3-Axis Phone Gimbal, ActiveTrack 7.0, One-Tap Edit, 10hrs Use, Phone Charging |
|
| 6 | Zeadio Video Action Stabilizing Handle Grip Handheld Stabilizer with Cold-Shoe Mount for All DSLR Camera Camcorder |
|
| 7 | FeiyuTech SCORP 2 Gimbal Stabilizer for DSLR and Mirrorless Camera, Integrated Al Tracking Sensor, 3-Axis Camera Stabilizer for Sony Canon Panasonic Nikon, 2.5kg Payload Touch Screen Vertical Shooting |
|
| 8 | 3-Shoe DSLR/Mirrorless/Action Camera Camcorder Phone Stabilizer Expansion Cage Mount Moviemaking Holder Rig YouTube Tiktok Vlogging Video Kit Compatible with GoPro Canon Nikon Sony iPhone Android |
|
| 9 | DJI RS 3 Mini, 3-Axis Gimbal Stabilizer for Cameras Canon/Sony/Panasonic/Nikon/Fujifilm, 2 kg (4.4 lbs) Tested Payload, Camera Gimbal with Native Vertical Shooting, Black |
|
| 10 | DJI Osmo Mobile 8 Advanced Tracking Combo Gimbal Stabilizer for Phone, AI Native Tracking with Audio & Lighting, 360° Pan Rotation, Built-in Extension Rod & Tripod, 10h Battery, Extension Rod |
|
This is arguably the most crucial feature for pain-free low-angle photography. A camera with a fully articulating or tilting LCD screen allows you to compose your shots from a standing or slightly crouched position, eliminating the need to lie flat on the ground. You can simply tilt the screen upwards to get a clear view of your frame, adjust settings, and nail the focus, all while maintaining a more comfortable posture. For those serious about low-angle work, this feature is a game-changer that pays dividends in both comfort and shot accuracy.
Mini Tripods and Ground-Level Mounts
Traditional tripods often struggle to get truly low, but specialized mini tripods and ground-level mounts are designed precisely for this purpose. Brands like Joby GorillaPod offer flexible legs that can grip onto uneven surfaces or be splayed out for maximum stability close to the ground. Flat-plate mounts, such as Platypods, provide an incredibly stable platform that sits directly on the ground, allowing you to attach a ball head and position your camera just inches from the surface. These tools keep your camera steady and at the perfect low height, freeing you from constant crouching or balancing acts.
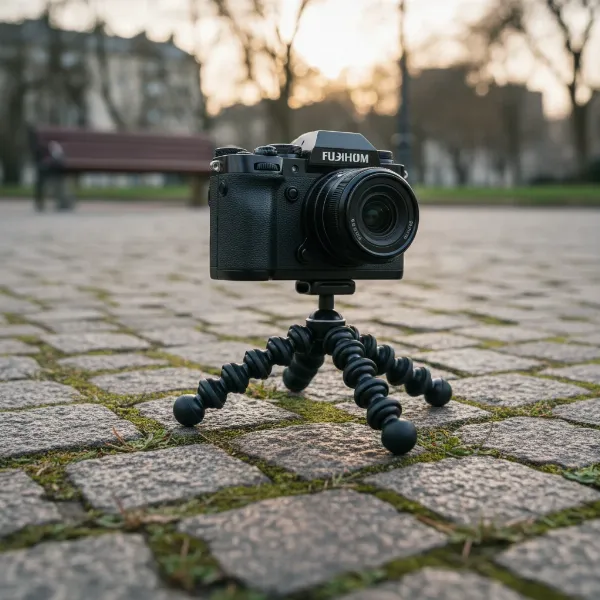 A compact mini tripod holding a mirrorless camera close to the ground on a natural surface.
Remote Shutter Releases and Camera Apps
For ultimate comfort and shake-free operation, a remote shutter release or a camera’s companion app is invaluable. These tools allow you to trigger the shutter without touching the camera, which is especially useful when the camera is placed in an awkward position or on a delicate surface. Many modern cameras also offer smartphone apps that provide live view functionality, allowing you to see exactly what your camera sees on your phone screen and adjust settings remotely. This means you can place your camera in the ideal low-angle spot and control it from a comfortable distance, eliminating any physical strain.
Wide-Angle Lenses
While not directly related to comfort, a wide-angle lens (typically 35mm or below on a full-frame equivalent) significantly enhances the impact of low-angle shots. These lenses naturally exaggerate perspective, making foreground elements appear larger and more dominant, while still capturing an expansive background. This effect is particularly striking from a low vantage point, emphasizing the “larger than life” quality often sought in this style of photography. It helps you tell a more compelling story and makes the effort of getting low even more rewarding.
External Monitors
For professional setups or when maximum visibility is needed, an external monitor connected to your camera can be a powerful asset. These larger screens provide a much clearer view of your composition, focus, and exposure, especially in bright conditions or when the camera’s built-in screen is difficult to see. While it adds another piece of equipment to your kit, it can greatly improve the precision and comfort of your low-angle workflow, allowing you to perfectly frame your shot without straining to see a tiny screen.
Smart Techniques to Avoid Strain
Beyond specialized gear, employing smart shooting techniques can further mitigate physical discomfort when capturing low-angle shots. It’s about working smarter, not harder.
The “Set and Forget” Method with Tripods/Mounts
Once you have your mini tripod or ground-level mount in place, position your camera and adjust its angle using the ball head. Then, step back. With an articulating screen, remote trigger, or camera app, you can fine-tune your composition and capture the shot without needing to constantly bend or kneel. This “set and forget” approach allows you to take multiple shots from a comfortable standing or seated position, experimenting with different compositions or waiting for the perfect moment without enduring prolonged discomfort.
Strategic Camera Placement
Before you even touch your camera, survey the scene and mentally (or physically) identify the ideal low vantage point. Look for natural depressions, small ledges, or objects that can support your camera at the desired height. Sometimes, a slight shift in your subject or camera position can make a significant difference in both the final image and your comfort level. Think about how the light hits the subject from that low angle and what elements will be in the foreground, middle ground, and background. Pre-visualizing your shot can save you time and physical effort during the actual capture.
Embrace “Shooting Blind” and Review
When you find yourself without an articulating screen or remote control, don’t despair. “Shooting blind” involves placing your camera close to the ground, estimating your composition, and taking several shots. The beauty of digital photography lies in instant feedback. After each burst, pick up your camera, review the images, and adjust your aim slightly if needed. Repeat this process until you achieve the desired frame. While it requires a bit more trial and error, it’s a perfectly viable technique and can lead to surprisingly creative results. Just remember to shoot generously, knowing you can delete the misses later.
Mastering the Art of Low-Angle Composition
Beyond the mechanics, truly impactful low-angle photography requires a keen eye for composition. These techniques will help you maximize the dramatic potential of your unique perspective.
Foreground, Subject, and Background
Low-angle shots naturally emphasize foreground elements, which can add immense depth and interest to your image. Look for leading lines, textures, or small objects in the immediate foreground that can draw the viewer’s eye into the scene. Ensure your main subject is clearly defined and stands out against the background. A wide-angle lens, combined with a relatively deep depth of field, will help keep all these elements in focus, creating a rich, layered image.
Maintaining a Level Horizon
A common pitfall in low-angle photography is a tilted horizon. Because you’re often viewing the scene from an unusual angle, it’s easy to misjudge the horizontal alignment. A crooked horizon can instantly detract from the professionalism of your shot. Always take an extra second to check your camera’s in-built level (if available) or use the grid lines on your LCD screen to ensure your horizons are perfectly straight. This small detail makes a significant difference in the overall impact and polish of your image.
Managing Sky Exposure
Low-angle shots frequently include a significant portion of the sky, which can often be much brighter than your foreground subject. This contrast can lead to blown-out highlights in the sky or underexposed foregrounds. To combat this, consider using a graduated neutral density (GND) filter, which darkens the sky while leaving the foreground unaffected. Alternatively, you can bracket your exposures (take multiple shots at different exposures) and blend them later in post-processing to create a perfectly exposed image across the entire dynamic range.
Finding Your Unique Perspective
The real magic of low-angle photography lies in its potential for uniqueness. Don’t just settle for the obvious low shot. Experiment. Try different focal lengths, vary your camera’s distance from the subject, and explore different angles of tilt. What happens if you get even lower? What if you shoot through a small gap or use a reflection on the ground? The goal is to develop your own signature style and tell a story that only you can tell from that particular viewpoint.
Expert Advice: Optimizing Your Workflow
To consistently achieve stunning low-angle shots without the discomfort, integrate these expert tips into your photographic workflow.
Preparation is key. Before you even head out, think about the kind of low-angle shots you want to capture and the gear that will facilitate them. Pack wisely, bringing only what you need to avoid unnecessary bulk. During your shoot, take breaks, stretch, and be mindful of your body. Photography should be an enjoyable pursuit, not a pain-inducing chore. Don’t be afraid to experiment and adjust your approach if something isn’t working for your body or your shot. Prioritizing both your creative vision and your physical well-being will lead to more satisfying results.
“The true art of photography lies not just in what you capture, but how you capture it. With low-angle shots, comfort and creativity go hand-in-hand. Smart gear choices and thoughtful techniques liberate you to focus on the magic, not the strain.” – Sarah Chen, Professional Landscape Photographer
Buying Guide: Choosing the Right Tools
When investing in gear for comfortable low-angle photography, consider these factors to ensure you make the best choice for your needs.
First, think about your camera type. Does your DSLR, mirrorless, or even smartphone have compatible accessories? Some mounts are universal, while others are specific. Next, consider your budget. Entry-level mini tripods are affordable, while advanced ground-level platforms and remote systems can be a larger investment. Evaluate the value received versus the cost, prioritizing features that will most directly address your comfort and shooting style. Finally, portability needs are crucial. If you’re hiking or traveling light, a compact and lightweight solution will be more practical than a bulky setup. Always read reviews and compare products to find the perfect balance between functionality, durability, and ergonomic benefits.
Conclusion
Embracing low-angle photography opens up a world of compelling visual narratives, allowing you to present subjects with newfound drama, scale, and emotional depth. By leveraging smart equipment like articulating screens, mini tripods, and remote controls, alongside ergonomic shooting techniques, you can comfortably capture these powerful perspectives without compromising your physical well-being. Remember to always prioritize your comfort, plan your shots strategically, and continuously experiment to refine your unique low-angle vision. What new perspectives will you uncover when you’re free to explore the world from the ground up?
Frequently Asked Questions
What is the best lens for low-angle photography?
A wide-angle lens, typically 35mm or below for full-frame cameras, is often best for low-angle photography. It enhances perspective distortion, making foreground elements appear larger and creating a more expansive, dramatic field of view that truly emphasizes the low vantage point.
How do you keep your camera stable for low shots?
To keep your camera stable for low shots, use a mini tripod or a ground-level mount like a Platypod. These accessories allow you to position your camera securely just inches from the ground. Alternatively, utilize a stable surface like a rock or a bag of rice to support your camera.
Can I shoot low-angle with a smartphone?
Yes, you can absolutely shoot low-angle with a smartphone. Many smartphones now have excellent wide-angle lenses, and you can achieve stability by placing the phone directly on the ground (often upside down to get the lens even lower) or using a small smartphone tripod or grip.
What are the common mistakes to avoid in low-angle photography?
Common mistakes include a tilted horizon, blown-out skies due to high contrast, and a lack of a clear subject. Always check your horizon, manage exposure carefully (e.g., with HDR or filters), and ensure your primary subject remains the focal point of your low-angle composition.