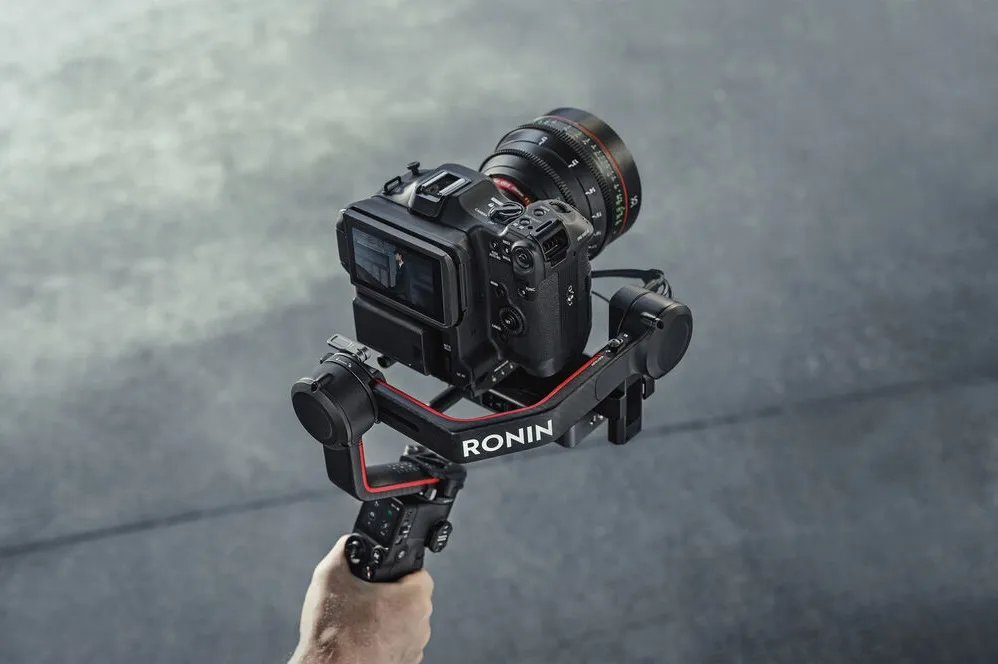
You’ve invested in a gimbal, a marvel of modern engineering designed to grant your camera the freedom of fluid motion. Yet, you find your footage still lacks that professional, polished look you see in films. The secret often lies not in the hardware itself, but in the software that controls it. Unlocking the Best Gimbal Settings For Cinematic Video is the crucial step that separates amateur-looking shots from truly breathtaking sequences. It’s the digital equivalent of a seasoned camera operator’s steady hand, and mastering it is your ticket to a higher level of filmmaking.
Are you tired of robotic, lifeless camera movements? Do you want to transform jerky pans into smooth, elegant reveals? This comprehensive guide will demystify the core parameters of your gimbal. We will move beyond the default “out-of-the-box” settings and empower you to dial in the precise controls needed to capture stunning, cinematic footage every time.
The Philosophy: Why Default Gimbal Settings Fail the Cinematic Test
Before we dive into the numbers and sliders, it’s essential to understand the “why.” A gimbal’s primary job is to counteract unwanted movement—jitters, shakes, and bumps. Default settings are typically configured to do this as aggressively as possible, resulting in motion that is stable, but often feels sterile and robotic.
Cinematic movement, however, is about intention. It’s controlled, graceful, and motivated by the story. It has a subtle human touch. Think of a Hollywood dolly shot; it doesn’t start or stop instantly. It eases into motion and gently comes to a rest. Our goal is to configure our gimbal to emulate this organic, deliberate movement. The best gimbal settings for cinematic video are not about maximum stabilization, but about controlled, nuanced motion.
A gimbal gets you 80% of the way to smooth footage. The final 20%—the part that feels truly cinematic—comes from mastering your settings and your technique.
Decoding the Core Gimbal Parameters
Every gimbal brand, from DJI to Zhiyun to Moza, uses slightly different terminology, but the core principles remain the same. Let’s break down the essential settings you need to master.
1. Follow Speed (Pan, Tilt, and Roll)
What it is: This setting determines how quickly the gimbal’s motors react to your physical movements. A high follow speed means the camera will pan or tilt almost instantly as you turn. A low follow speed introduces a delay, creating a softer, more gradual motion.
- The Analogy: Think of it as the difference between a sports car’s steering and a luxury sedan’s. The sports car’s steering is twitchy and responsive for quick maneuvers. The luxury sedan’s is smooth and dampened for a comfortable ride. For cinematic work, we almost always want the luxury sedan.
- Cinematic Setting: Start with a low value. For a slow, dramatic pan, you might set the Pan Follow Speed to a value between 5 and 15 (on a scale of 100). This forces you to be deliberate and results in a much more graceful and controlled shot.
2. Deadband (or Dead Zone)
What it is: The deadband is a threshold. It dictates how much you must move the gimbal handle before the motors engage and begin to follow your motion. A large deadband means you can make small, accidental movements without them translating to the camera.
- The Analogy: Imagine the slight “play” in a car’s steering wheel. You can wiggle it a tiny bit left and right before the wheels actually begin to turn. The deadband is that buffer zone for your gimbal.
- Cinematic Setting: A medium to high deadband is generally preferable for cinematic video. It’s incredibly effective at filtering out micro-jitters from your hands or footsteps, especially during walking shots. Start with a value around 10-20. If you find the gimbal feels unresponsive, you can lower it slightly. For precise, quick whip-pans, you would use a very low deadband, but for most narrative work, a larger buffer is your friend.
3. Smoothness (or Acceleration)
What it is: This is perhaps the most critical setting for achieving a cinematic feel. Smoothness controls the easing—how gently the gimbal starts and stops a movement. A low smoothness value will cause the camera to start and stop abruptly. A high value will create a beautiful S-curve, ramping up the speed gradually and then gently decelerating to a stop.
- The Analogy: It’s the difference between slamming on a car’s brakes and gently applying pressure to come to a smooth stop. High smoothness is the hallmark of a professional camera operator.
- Cinematic Setting: Set this high. For most gimbals, you’ll want to push the Smoothness or Acceleration setting to a value of 20 or higher. This will give all your pans and tilts that elegant, feathered quality that immediately looks more professional.
Putting It All Together: The Best Gimbal Settings for Cinematic Video
Now that we understand the individual components, let’s create a blueprint. These are excellent starting points. You should always fine-tune them based on your specific camera/lens weight, the gimbal you’re using, and the desired feel of your shot.
The “Go-To” Cinematic Profile
This profile is designed for smooth, graceful movements like slow reveals, parallax shots, and gentle following shots.
- Follow Speed (Pan & Tilt): Low (e.g., 5-15)
- Deadband (Pan & Tilt): Medium (e.g., 10-15)
- Smoothness/Acceleration (Pan & Tilt): High (e.g., 20-30)
- Joystick Speed: Low (e.g., 10-20)
- Joystick Smoothing: High (e.g., 20+)
Why this works: The low speed and high smoothness create elegant, controlled motion. The medium deadband absorbs minor operator errors, ensuring the final footage is clean. This is your workhorse setting for 90% of narrative and commercial filmmaking. For more tips on camera work, check out our guide to [mastering cinematic camera movements].
The “Action Follow” Profile
This profile is for when you need to track a faster-moving subject, like a person running or a vehicle. It prioritizes responsiveness over ultimate smoothness.
- Follow Speed (Pan & Tilt): Medium-High (e.g., 40-60)
- Deadband (Pan & Tilt): Low (e.g., 1-5)
- Smoothness/Acceleration (Pan & Tilt): Medium (e.g., 10-15)
Why this works: The higher speed and low deadband allow the gimbal to react quickly so you don’t lose your subject. The medium smoothness prevents the movement from being jarringly abrupt, maintaining a degree of cinematic quality even at speed.
What About Follow Modes?
Your settings work in tandem with your gimbal’s follow modes. Choosing the right mode is just as important as dialing in the right numbers.
- Pan Follow (PF): The most common cinematic mode. The gimbal follows your panning movements (left and right) smoothly but keeps the tilt locked. This is perfect for orbiting a subject or executing reveals.
- Pan and Tilt Follow (PTF): The gimbal follows both your panning and tilting movements. Useful for shots where you need to follow a subject that is changing elevation, like someone walking up a flight of stairs.
- Lock Mode (L): The camera’s direction is completely locked, no matter how you move the handle. This is ideal for “jib” style shots where you want the camera to move through space while pointing at a fixed spot.
- FPV Mode: All three axes (pan, tilt, and roll) follow your movement, creating a disorienting, first-person-view effect. Use this sparingly for specific stylistic shots, as it is generally not considered traditionally “cinematic.”
The Human Factor: Technique is Everything
Remember, even with the best gimbal settings for cinematic video, the gimbal is a tool, not a magician. Your physical technique is the final, critical ingredient.
- Balance Perfectly: Before you even turn it on, ensure your camera is perfectly balanced on all three axes. An imbalanced gimbal will force the motors to work harder, resulting in micro-jitters and reduced battery life.
- Use Two Hands: Always operate your gimbal with two hands for maximum stability and control.
- The “Ninja Walk”: Bend your knees and walk heel-to-toe. This technique uses your body as a natural shock absorber, minimizing the vertical “bouncing” motion that even the best gimbals struggle to eliminate completely.
- Plan Your Moves: Don’t just point and shoot. Rehearse your camera movement. Know your start point, your end point, and the path you will take. Intentionality is key.
If you’re still in the market for a device, be sure to read [our ultimate guide to choosing the right gimbal for your needs].
Frequently Asked Questions (FAQ)
How do I stop my footage from bouncing when I walk with a gimbal?
The “bouncing” or “bobbing” motion is vertical (Z-axis) movement. A standard 3-axis gimbal cannot correct for this. The solution is physical technique: master the “ninja walk” by bending your knees and walking smoothly. Some high-end systems use a 4th or 5th axis arm (like a Steadicam arm) to absorb this, but for most users, technique is the answer.
Should I turn on my camera’s built-in stabilization (IBIS/OIS) when using a gimbal?
This is a debated topic. The general consensus is:
- For wide lenses: It’s often best to turn off in-body image stabilization (IBIS) and optical image stabilization (OIS). Sometimes, the camera’s stabilization can “fight” the gimbal’s movements, causing strange micro-jitters or artifacts.
- For telephoto lenses: You may benefit from leaving lens OIS on, as it can help dampen the tiny vibrations that are more noticeable with a longer focal length.
- Your best bet: Test it! Do a quick shot with it on and a shot with it off, and see which looks smoother for your specific camera and lens combo.
What is the most common mistake beginners make with gimbal settings?
The most common mistake is leaving the settings on default. Default settings are usually too fast and responsive, leading to robotic and twitchy movements. Taking just 10 minutes to dial in slower, smoother settings will dramatically improve the quality of your footage.
Why does my gimbal sometimes shake or vibrate?
This is almost always caused by one of two things: an improper balance or motor power (stiffness) that is set too high for your camera’s weight. First, re-balance your camera perfectly. If the issue persists, run the gimbal’s “auto-tune” function or manually lower the motor stiffness settings until the vibrations stop.
How often should I calibrate my gimbal?
You should perform a full calibration (both six-sided and motor) whenever you change your camera or lens setup, after traveling with the gimbal, or if you notice it isn’t holding the horizon level. A quick balance should be done every single time you mount the camera.
Conclusion: Your Journey to Cinematic Motion
Mastering your gimbal is a journey of a thousand tiny adjustments. There is no single “magic number” that works for every situation. The best gimbal settings for cinematic video are the ones that are thoughtfully tailored to the story you want to tell. By understanding the core principles of speed, deadband, and smoothness, you move from being a mere operator to a true filmmaker, capable of crafting motion that is not just stable, but also emotional, intentional, and deeply cinematic. So go ahead, dive into your app’s settings, start experimenting, and unlock the incredible creative potential waiting inside your gimbal.