Have you ever meticulously balanced your camera on a state-of-the-art gimbal, only to review your footage and find it plagued by subtle, frustrating micro-jitters? These tiny, almost imperceptible camera shakes can quickly undermine the professional look you’re striving for, transforming cinematic aspirations into amateurish wobbles. Even the most advanced camera stabilizers aren’t magic wands; they are precision instruments that demand careful setup and refined technique. This comprehensive guide will dissect the common culprits behind micro-jitters and provide you with expert strategies—from meticulous balancing and optimized camera settings to advanced operational techniques and post-production fixes—ensuring you achieve that buttery-smooth, stable footage every single time.
Understanding Micro-Jitters in Gimbal Footage
Micro-jitters are minute, high-frequency vibrations that manifest as a subtle, annoying shake in your video. While a gimbal excels at stabilizing rotational movements across the pan, tilt, and roll axes, it doesn’t inherently negate all six axes of camera movement. This means that lateral (X), vertical (Y), and forward/backward (Z) motions, often introduced by the operator’s body, can still translate into unwanted jitters. Recognizing these tiny tremors is the first step toward correcting them. They compromise the overall polish of your video, distracting viewers and diminishing the professional quality of your work.
Key Factors Causing Micro-Jitters and How to Address Them
Achieving truly smooth footage requires addressing potential issues at every stage, from initial setup to the moment you press record.
Imperfect Gimbal Balancing
The foundation of stable gimbal footage lies in perfect balancing. Many creators believe a quick auto-balance is sufficient, but this is often not the case. A perfectly balanced camera setup should remain motionless in any position you place it when the gimbal is powered off. If your camera tilts or drifts, even slightly, the gimbal motors will constantly fight against gravity, leading to overcompensation and the dreaded micro-jitters. This meticulous process goes beyond simply getting a “good” reading from your gimbal’s app; it requires fine-tuning each axis until the camera is truly neutral.
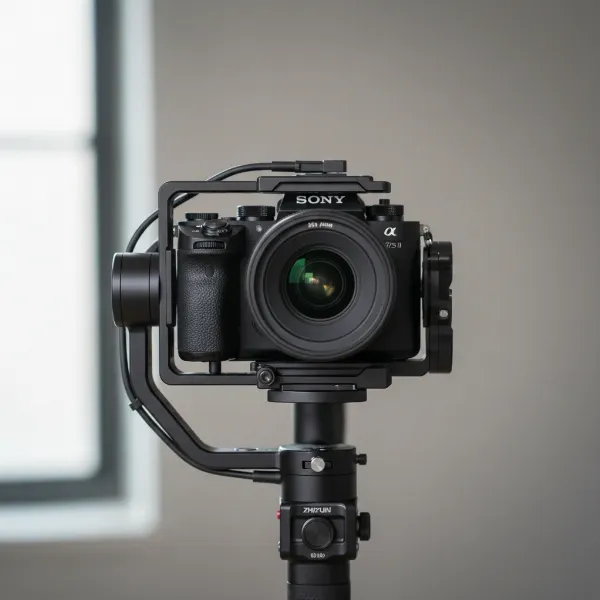 A camera setup perfectly balanced on a three-axis gimbal, standing motionless, ready for shooting.
Camera and Lens Stabilization Conflicts
Modern cameras and lenses often feature built-in image stabilization (IBIS and OIS). While these are invaluable for handheld shooting, they can become a source of conflict when paired with a gimbal. The camera’s internal system attempting to stabilize while the gimbal does the same creates a “stabilization fight,” resulting in jerky, unnatural movements or micro-jitters. The general recommendation is to turn off both IBIS and OIS when using a gimbal. However, some Sony camera users report improved results with IBIS enabled on their gimbals, suggesting that experimentation with your specific setup is wise.
Suboptimal Gimbal Settings
Your gimbal’s internal settings play a critical role in its responsiveness and ability to handle various movements.
- Motor Strength: The motors in your gimbal should be powerful enough to stabilize your camera rig without overcompensating. If the motor strength is set too high for a lighter payload, or too low for a heavy one, it can lead to constant adjustments and jitters. Manually adjusting motor strength after auto-calibration can often resolve these issues, finding the sweet spot where the motors work efficiently without straining or overshooting.
- Deadband: This setting defines how much movement input the gimbal ignores before reacting. A “high” deadband setting means the gimbal is less sensitive to small, unintentional movements, resulting in a slower, more deliberate, and ultimately smoother response. Conversely, a low deadband can make the gimbal hyper-responsive, reacting to every tiny twitch and producing jitters.
- Follow Speed: A slower follow speed allows the gimbal to pan and tilt more gradually, contributing to a fluid, cinematic motion. Rapid follow speeds, while useful for dynamic action, can often introduce abrupt movements that appear as jitters in more controlled shots.
Operator Technique and Movement
Even the most advanced gimbal cannot fully compensate for a shaky operator. Your body’s movements along the X, Y, and Z axes are critical to smooth footage.
- The “Ninja Walk”: This technique involves bending your knees, maintaining a low center of gravity, and taking soft, deliberate steps, rolling from heel to toe. The goal is to absorb impacts and minimize vertical (Z-axis) up-and-down motion that the gimbal cannot eliminate.
- Loose Grip: Avoid gripping the gimbal too tightly. A death grip can transfer muscle tremors directly to the stabilizer. Instead, let the gimbal’s weight rest gently in your hand, maintaining a loose but controlled hold to allow the motors to work freely.
- Engage Your Core: Focus on using your core muscles to stabilize your upper body rather than relying solely on your arms. This provides a more stable foundation for your movements.
- Add Weight: Counterintuitively, adding overall weight to your camera rig can improve stability. A heavier system has more inertia, making it less susceptible to small, abrupt movements. This can involve using counterweights, camera cages, or other accessories to achieve an optimal mass and balance.
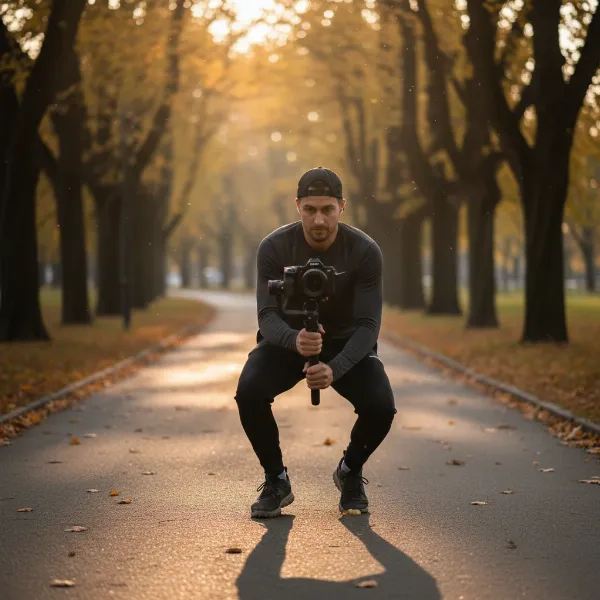 A videographer performing the "Ninja Walk" technique for smooth gimbal footage.
Environmental and Gear-Related Issues
Sometimes, the cause of micro-jitters isn’t directly related to stabilization settings.
- Loose or Stiff Cables: Any stiff or poorly managed cable (HDMI, USB, microphone) that snags or presses against the gimbal’s axes can introduce resistance, causing subtle twitches and jitters. Use flexible cables and ensure they have enough slack to move freely without obstruction.
- Shutter Speed and Frequency Mismatch: When shooting indoors, a mismatch between your camera’s shutter speed and the local power grid’s frequency (e.g., 50Hz in Europe/Asia, 60Hz in North America) can create a subtle flicker or “jello” effect. Setting your shutter speed to a multiple of the frequency (e.g., 1/50s or 1/100s for a 50Hz region) can eliminate this.
- Lens Issues: Check your lens for any “backlash” or play in its moving parts. Even a slight movement within the lens itself can translate into micro-jitters. Ensure your camera plate and any lens support are securely fastened, preventing any unwanted movement between the camera body and lens.
- Payload Considerations: Gimbals have specific payload ranges. If your camera setup is too light, the motors might overcompensate, leading to jitters. If it’s too heavy, the motors will strain, potentially causing unstable footage. Always ensure your total setup weight falls within the gimbal’s optimal operating range.
Advanced Strategies and Post-Production Solutions
Even after perfecting your in-camera setup and technique, some situations may call for additional measures.
Enhancing Physical Stability
Beyond basic operation, certain accessories and shooting choices can provide an extra layer of stability.
- Dual Handle Systems: Adding dual handles to your gimbal offers a wider grip and better weight distribution, which can significantly enhance control and reduce operator fatigue, leading to smoother, more consistent footage.
- Support Systems (e.g., Tilta Float, EasyRig): For heavier camera packages or extended shooting sessions, professional support systems like the Tilta Float or EasyRig can offload the weight from your arms to your body. These systems often incorporate springs or mechanical arms that provide additional Z-axis stabilization, further smoothing out walking motion.
- Wider Focal Lengths: Shooting with wider-angle lenses inherently minimizes the visual impact of any residual micro-jitters. The wider field of view makes small movements less noticeable compared to telephoto focal lengths, which magnify every tremor.
- Higher Frame Rates: Capturing footage at higher frame rates (e.g., 60 frames per second or higher) can produce naturally smoother results. These extra frames provide more data for either in-camera stabilization or post-production smoothing, making subtle movements less jarring and offering greater flexibility for slow-motion effects.
Post-Production Stabilization
While it’s always best to capture stable footage in-camera, post-production tools can offer a final polish for minor imperfections.
- Warp Stabilizer (Adobe Premiere Pro/After Effects): This powerful tool can effectively smooth out jitters. However, use it judiciously and with low strength settings (typically between 5-10%). Over-applying Warp Stabilizer can introduce undesirable “jello” effects or warping around the edges of your frame.
- Crop Allowance: To mitigate the slight cropping that post-stabilization tools often require, consider shooting your footage slightly wider than your final desired frame. This gives the software room to stabilize without cutting into essential parts of your composition.
- Dedicated Stabilization Software: Tools like DaVinci Resolve’s built-in stabilizer or specialized software such as Sony Catalyst Browse/Prepare can offer robust options for fine-tuning stability and correcting specific types of jitters.
Buying Guide: Expert Advice for Choosing a Camera Stabilizer
Selecting the right Camera Stabilizer is as crucial as mastering its operation. Here’s what to consider:
- Match Gimbal to Camera System: Always choose a gimbal with a payload capacity that comfortably accommodates your heaviest camera body, lens, and accessory setup. Overloading a gimbal leads to poor performance and increased jitters.
- Read User Reviews: Delve into real-world user experiences for specific gimbal models, paying close attention to comments about micro-jitters and stability issues. This can reveal common quirks or limitations not evident in marketing materials.
- Build Quality and Precision: Generally, higher-end gimbals feature more precise motors, robust construction, and advanced calibration algorithms that contribute to superior stabilization. While budget-friendly options exist, professional work often benefits from investing in quality.
“Achieving perfectly smooth footage requires a combination of high-quality gear, meticulous setup, and refined operating skills. Don’t expect magic; precision is key.” – Admin of StabilizerPro.com
Common Mistakes to Avoid
Even experienced videographers can fall prey to common pitfalls that exacerbate micro-jitters. Avoid these to ensure your footage remains pristine:
- Relying Solely on Auto-Calibration: While auto-calibration provides a good starting point, it’s rarely a perfect solution. Always manually fine-tune your balance after an auto-calibration.
- Ignoring Cable Management: Don’t underestimate the impact of unruly cables. Ensure they are flexible, secure, and clear of the gimbal’s movement axes.
- Aggressive Gimbal Movements: Panning, tilting, or moving too quickly can overwhelm the gimbal’s motors, leading to jerky footage. Practice slow, deliberate movements.
- Over-Stabilizing in Post: Excessive application of post-production stabilization can introduce artifacts like warping or a “jello” effect, which can be worse than the original jitters.
Conclusion
Micro-jitters in gimbal footage are a common, yet solvable, challenge that every videographer eventually encounters. By understanding their various causes—from imperfect balancing and conflicting stabilization systems to suboptimal settings and operator technique—you can systematically address them. Remember that achieving truly cinematic, jitter-free video is a holistic endeavor, requiring a blend of precise technical setup, practiced physical movement, and thoughtful post-production finesse. Don’t be discouraged; continuous practice and attention to these details will transform your footage from shaky to spectacularly smooth.
What’s your go-to trick for achieving truly cinematic, jitter-free gimbal shots?
Frequently Asked Questions
Should I always turn off IBIS when using a gimbal?
While general advice often suggests turning off In-Body Image Stabilization (IBIS) to prevent conflicts, some modern cameras, particularly Sony models, can surprisingly benefit from having it on with gimbals. It’s highly recommended to test both configurations with your specific camera and lens setup to determine which yields the smoothest results for your workflow.
How important is gimbal balancing for micro-jitters?
Perfect gimbal balancing is paramount. If your camera setup doesn’t remain still in any orientation when the gimbal is powered off, the motors will constantly work overtime to correct imbalances, leading to strain and introducing micro-jitters. Precise balancing minimizes motor effort and optimizes the gimbal’s stabilization performance.
Can post-production stabilization completely remove micro-jitters?
Post-production tools like Warp Stabilizer can certainly help reduce micro-jitters, but they are most effective when used for minor corrections at low strength settings (e.g., 5-10%). Over-stabilizing can introduce undesirable warping or “jello” effects, often making the footage look worse than the original jitters. It’s always best to prioritize in-camera stability.
What is the “deadband” setting on a gimbal?
Deadband refers to a sensitivity range within which the gimbal motors will not react to subtle input movements. Setting a higher deadband makes the gimbal less sensitive to tiny, unintentional operator movements, resulting in smoother, more gradual responses and effectively reducing abrupt jitters from subtle hand tremors.
Does the weight of my camera setup affect micro-jitters?
Yes, the weight of your camera setup significantly affects micro-jitters. A payload that is too light for the gimbal might cause the motors to overcompensate aggressively. Conversely, an overly heavy setup can strain the motors beyond their optimal capacity. Ensuring your camera and accessories fall within the gimbal’s recommended payload range is crucial for stable footage.
How does shutter speed relate to micro-jitters?
An incorrect shutter speed, especially when mismatched with your local power grid’s frequency (e.g., 50Hz or 60Hz), can cause a subtle flicker or a “jello” effect, which appears as a type of micro-jitter. Adjusting your shutter speed to a multiple of the frequency (e.g., 1/50s or 1/100s for a 50Hz region) can effectively eliminate this issue.