Are you tired of shaky, unprofessional-looking video ruining your creative vision? Modern mirrorless cameras capture incredible detail, but even the slightest hand tremor can turn cinematic aspirations into a jumbled mess. A camera stabilizer, specifically a gimbal, is the game-changer you need to achieve buttery-smooth, stable footage. Many believe professional stabilization comes with a hefty price tag, but that’s simply not true.
In this guide, we’ll dive deep into the world of affordable stabilization, proving that you can capture stunning, fluid video without emptying your wallet. We’ve meticulously researched and identified the top 5 budget gimbals for mirrorless cameras that cost under $300, ensuring you get the best value, performance, and features. Let’s unlock the full potential of your mirrorless camera and transform your videography.
What is a Camera Stabilizer, and Why Do You Need One?
A camera stabilizer is a device designed to keep your camera steady and level, counteracting unwanted movements like shakes, tilts, and bumps during filming. It ensures that even when you’re walking, running, or moving dynamically, your footage remains smooth and professional. Imagine effortlessly gliding through a scene, capturing every moment with cinematic precision.
While there are various types of camera stabilizers, such as Steadicams, sliders, and tripod-based systems, motorized gimbals have become the go-to for many videographers. These intelligent devices use advanced algorithms and brushless motors to automatically detect and compensate for motion across three axes (pan, tilt, and roll), delivering incredibly stable results. The benefits are immense: from transforming amateur home videos into polished productions to enabling dynamic, engaging shots for vlogs, short films, and event coverage. A good camera stabilizer not only elevates the quality of your video but also expands your creative possibilities, allowing you to focus on storytelling rather than fighting camera shake.
Key Factors When Choosing a Budget Camera Stabilizer
Selecting the right gimbal, especially when working with a strict budget, requires careful consideration. You want a device that not only fits your price range but also reliably meets your shooting needs without compromising on quality. Here are the essential factors to evaluate.
Camera Compatibility & Payload
|
Our Picks for the Best Camera Stabilizer in 2026
As an Amazon Associate I earn from qualifying purchases.
|
||
| Num | Product | Action |
|---|---|---|
| 1 | 3-Shoe DSLR/Mirrorless/Action Camera Camcorder Phone Stabilizer Expansion Cage Mount Moviemaking Holder Rig YouTube Tiktok Vlogging Video Kit Compatible with GoPro Canon Nikon Sony iPhone Android |

|
| 2 | DJI Osmo Mobile 8 Advanced Tracking Combo Gimbal Stabilizer for Phone, AI Native Tracking with Audio & Lighting, 360° Pan Rotation, Built-in Extension Rod & Tripod, 10h Battery, Extension Rod |
|
| 3 | FeiyuTech SCORP 3 Gimbal Stabilizer for Camera, Built-in AI Tracking Sensor & Detachable Remote Control, 3.5KG Payload Camera Stabilizer with Touch Screen, Vertical Shooting |
|
| 4 | FeiyuTech SCORP 2 Gimbal Stabilizer for DSLR and Mirrorless Camera, Integrated Al Tracking Sensor, 3-Axis Camera Stabilizer for Sony Canon Panasonic Nikon, 2.5kg Payload Touch Screen Vertical Shooting |
|
| 5 | ZHIYUN CINEPEER Weebill 3E [Official], 3-Axis Lightweight Gimbal Stabilizer for DSLR & Mirrorless Camera Canon/Sony/Panasonic/Nikon, 3KG Payload, Native Vertical Shooting, Bluetooth Shutter Control |
|
| 6 | Zeadio Camera Stabilizer Kit, All-in-One Handheld Stabilizer with LED Video Light, Microphone, Phone Holder & Action Camera adaper, Fits for All Camera, DSLR, Action Camera and All Smartphones |
|
| 7 | DJI RS 3 Mini, 3-Axis Gimbal Stabilizer for Cameras Canon/Sony/Panasonic/Nikon/Fujifilm, 2 kg (4.4 lbs) Tested Payload, Camera Gimbal with Native Vertical Shooting, Black |
|
| 8 | Zeadio Video Action Stabilizing Handle Grip Handheld Stabilizer with Cold-Shoe Mount for All DSLR Camera Camcorder |
|
| 9 | DJI Osmo Mobile 7 Gimbal Stabilizer for iPhone, Android, Built-in Tripod, Portable Stabilizer for iPhone, Selfie Stick, 3-Axis Phone Gimbal, ActiveTrack 7.0, One-Tap Edit, 10hrs Use, Phone Charging |
|
| 10 | DJI Osmo Mobile 7P Gimbal Stabilizer for iPhone, Android, Native Tracking, Lighting, 3-Axis Phone Gimbal, Quick Launch, One-Tap Edit, Built-in Extension Rod & Tripod, 10hrs Use, Phone Charging |
|
The most crucial factor is ensuring the gimbal can comfortably support your mirrorless camera setup. Every gimbal has a maximum payload capacity, which is the total weight of your camera body, lens, and any accessories (like external microphones or small monitors) it can stabilize effectively. Exceeding this limit will result in poor performance, motor strain, and ultimately, unusable footage. For mirrorless cameras, look for gimbals that can handle at least 2-3 kg (4.4-6.6 lbs) to accommodate a variety of popular camera bodies and standard lenses. Always check your camera and lens’s combined weight before making a purchase.
Budget
Staying under the $300 mark means looking for excellent value. While some premium gimbals can cost upwards of $500-$1000, the budget segment has seen significant advancements, offering robust features once exclusive to higher-priced models. Expect solid stabilization, decent battery life, and often some intelligent features like basic tracking or intuitive controls. The goal is to find a balance where the cost reflects a reliable, functional tool that enhances your videography without unnecessary frills.
Intended Use
Your primary shooting scenarios will heavily influence the ideal gimbal. Are you a travel vlogger needing something lightweight and quick to set up? Or perhaps a content creator focusing on cinematic shots for short films?
- Travel/Vloggers: Prioritize portability, quick balancing, and long battery life.
- Action/Sports: Look for robust build quality and responsive motors.
- Professional/Short Films: While budget gimbals have limitations, some offer advanced modes and precise control for more complex shots.
Portability & Build Quality
A gimbal that’s easy to transport and comfortable to hold for extended periods is invaluable. Consider its folded size, weight, and the materials used in its construction. Lightweight yet durable materials like aluminum alloys are ideal. A compact design that fits easily into a backpack is perfect for creators on the go. Additionally, ergonomic grips and accessible controls contribute significantly to a smoother, less fatiguing shooting experience.
Comparing Popular Camera Stabilizer Types
While our focus is on gimbals, it’s helpful to briefly understand where they fit in the broader world of camera stabilization. Gimbals are a specific type of stabilizer, but other tools exist for different cinematic effects.
Types of Camera Stabilizers
| Feature | Gimbal | Steadicam (Manual Stabilizer) | Slider |
|---|---|---|---|
| Advantages | Easy to use, compact, highly versatile, electronic stabilization. | Ultra-smooth, organic motion, no batteries needed. | Creates linear tracking shots, easy to set up. |
| Disadvantages | Requires batteries, balancing can take time, electronic components can fail. | Steep learning curve, heavier, often more complex to operate. | Limited to linear movement, typically stationary, requires flat surface. |
| Best For | Vlogging, run-and-gun, dynamic sequences, social media content. | High-end cinematic productions, fluid walking shots. | Interviews, product shots, cinematic reveals, B-roll. |
Motorized gimbals dominate the market for mirrorless cameras due to their combination of advanced electronic stabilization, relative ease of use, and versatile shooting modes. They offer a significant upgrade in video quality for both casual shooters and aspiring professionals.
Top 5 Budget Gimbals for Mirrorless Cameras Under $300
Finding a reliable camera stabilizer that delivers professional results without breaking the bank is easier than ever. Here are our top five picks that consistently impress under the $300 price point, each offering a unique blend of features and value for mirrorless camera users.
1. FeiyuTech Scorp 2 – The AI-Powered Budget Beast
The FeiyuTech Scorp 2 has quickly become a favorite for mirrorless camera users seeking advanced features on a budget. Priced often under $280, it stands out with a robust payload capacity of up to 2.5 kg (5.5 lbs), making it suitable for many popular mirrorless bodies and lenses. Its most compelling feature is the integrated AI tracking module on the roll arm, allowing the gimbal to autonomously follow a subject with just a simple gesture, eliminating the need for an additional smartphone app for tracking. This is a game-changer for solo creators.
- Pros: Built-in AI tracking, dual-grip design for ergonomic comfort, intuitive OLED menu, quick-release Arca plate, excellent battery life (up to 13 hours).
- Cons: Motors might struggle with heavier f/2.8 zoom lenses, some users report initial Bluetooth connectivity quirks with certain cameras.
- Ideal User: Solo content creators, YouTubers, and vloggers who need reliable AI tracking and a comfortable shooting experience.
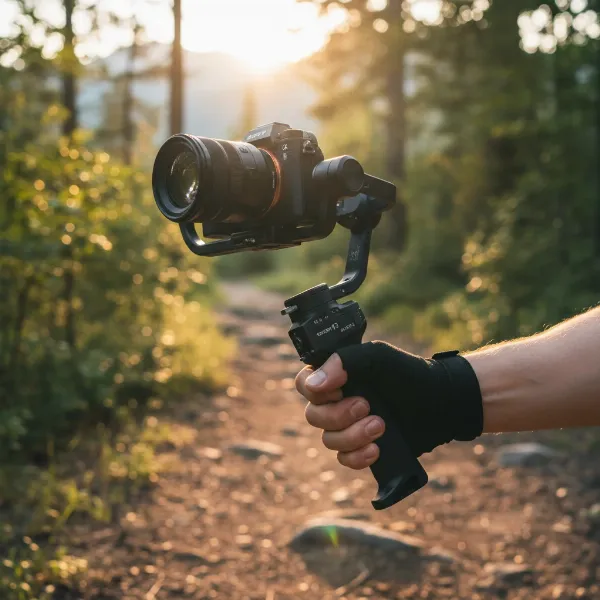 FeiyuTech Scorp 2 gimbal stabilizing a mirrorless camera for smooth video production
2. DJI RS 4 Mini – The Compact Powerhouse on a Deal
While often listed slightly above $300, the DJI RS 4 Mini frequently drops into budget territory during sales, making it an irresistible option. This compact gimbal weighs a mere 890g (1.96 lbs) yet supports a payload of up to 2 kg (4.4 lbs), comfortably handling most mirrorless cameras with a standard prime or lighter zoom lens. It boasts DJI’s renowned stabilization algorithms, auto-axis locks, and a bright 1.4-inch touchscreen for easy control. Its portability makes it a travel champion.
- Pros: Exceptionally lightweight and portable, pro-grade stabilization, auto-locking axes for quick setup, long battery life (up to 10 hours), optional AI tracking module.
- Cons: Requires rebalancing for vertical shooting, may insist on smartphone sign-up for full features, pushing payload limits can strain motors.
- Ideal User: Travel videographers, vloggers, and run-and-gun shooters who prioritize portability and reliable stabilization.
3. Zhiyun Weebill 3S – Ergonomics Meets Performance
The Zhiyun Weebill 3S, often found around the $270-$320 price point, is a strong contender known for its ergonomic design and solid performance. It supports mirrorless cameras with a payload capacity of up to 2.5 kg (5.5 lbs). The unique rotating sling grip and adjustable wrist rest significantly reduce fatigue during long shooting sessions, allowing for comfortable two-handed operation when needed. It also features built-in mic and LED light options (though some versions might sell these separately).
- Pros: Ergonomic sling grip and wrist rest, robust stabilization, Bluetooth shutter control, built-in mic and LED light (on some models), capable of quick landscape/portrait switching.
- Cons: Battery life (around 11.5 hours) is good but less than some competitors, initial baseplate setup might be loose before adjustment.
- Ideal User: Creators who value comfort and longer shooting durations, especially for event videography or documentary work.
4. Zhiyun Cinepeer Weebill 3E – The True Budget King
Dubbed by some as the “new king of low-cost gimbals,” the Zhiyun Cinepeer Weebill 3E is an excellent choice for those firmly in the $200-$250 range. It’s designed to be a no-frills, highly effective stabilizer for mirrorless and even some lighter DSLR setups. While it streamlines some advanced features found in its higher-end siblings, it retains the core stabilization performance that Zhiyun is known for, making it an incredible value proposition.
- Pros: Very affordable, solid stabilization for its price, good payload capacity for most mirrorless cameras, user-friendly design.
- Cons: Lacks some advanced features like dedicated tracking or a large touchscreen, screen is smaller and monochromatic.
- Ideal User: Beginners, students, or anyone looking for a highly effective and straightforward gimbal without complex features.
5. Hohem iSteady MT2 – Versatility on a Dime
The Hohem iSteady MT2 is a versatile budget gimbal that aims to serve a wide range of users, including those with mirrorless cameras, action cameras, and even smartphones. With a payload capacity around 1.2 kg (2.6 lbs), it’s best suited for smaller mirrorless cameras or compact setups. What it lacks in heavy-duty payload, it makes up for in sheer adaptability and smart features, often including an AI vision sensor for tracking and a magnetic fill light. Its modular design allows it to transform between different uses quickly.
- Pros: Highly versatile (supports mirrorless, action cameras, phones), compact and portable, features like AI vision sensor and magnetic fill light, often includes remote control capabilities.
- Cons: Lower payload capacity limits compatibility with heavier mirrorless rigs, build quality might feel less premium than higher-end models.
- Ideal User: Hybrid shooters who use multiple camera types, casual vloggers, and those who need maximum versatility from a single budget device.
Maximizing Your Budget Gimbal: Usage and Maintenance Tips
A budget gimbal can perform like a much more expensive one if you know how to use and care for it properly. Mastering a few key techniques will ensure you consistently get smooth, cinematic results and extend the lifespan of your equipment.
How to Balance and Set Up Your Stabilizer
Proper balancing is the single most critical step for optimal gimbal performance. An unbalanced camera forces the motors to work harder, leading to jerky footage, shorter battery life, and accelerated wear.
- Mount Your Camera: Secure your mirrorless camera and lens onto the gimbal’s quick-release plate. Ensure all accessories (mics, filters) that will be used during shooting are attached.
- Unlock Axes: Release all three axis locks (pan, tilt, roll).
- Balance Tilt Axis: Adjust the camera forward/backward until it stays level when tilted at any angle. Then adjust left/right until it’s perfectly horizontal.
- Balance Roll Axis: Adjust the horizontal arm until the camera doesn’t lean to either side.
- Balance Pan Axis: Adjust the vertical arm (where the gimbal connects to the handle) until the gimbal head remains still when you rotate the handle.
- Auto-Tune (if available): Many modern gimbals have an auto-tune feature that fine-tunes motor strength for your specific setup. Run this after manual balancing.
Tips for Smooth Filming
- Walk “Ninja Style”: Bend your knees slightly and walk smoothly, like a ninja, to minimize up-and-down motion.
- Use Your Core: Engage your core muscles to maintain stability and control the gimbal with your whole body, not just your arms.
- Practice Movement: Experiment with slow, deliberate movements. Practice panning, tilting, and orbiting subjects to get a feel for the gimbal’s responsiveness.
- Pre-plan Shots: Think about your movement before you start recording. Where will you start? Where will you end? What path will you take?
Cleaning and Storage
Regular maintenance ensures your gimbal remains in top condition.
- Clean Regularly: Use a microfiber cloth to wipe down the gimbal body and motors. Avoid harsh chemicals.
- Inspect Connections: Check that all screws and mounts are tight.
- Store Properly: When not in use, always lock the gimbal’s axes and store it in its protective case to prevent damage to the motors.
- Battery Care: Charge your batteries fully before storing for long periods, and cycle them every few months to maintain health.
Where to Buy Your Next Camera Stabilizer
Acquiring a budget gimbal for your mirrorless camera involves considering reputable retailers and understanding the finer points of purchase. You want to ensure you’re getting a genuine product with reliable support.
Many large online electronics retailers like Amazon, B&H Photo Video, and Adorama carry a wide selection of camera gimbals, often with competitive pricing and frequent sales. These platforms offer the convenience of doorstep delivery and usually have extensive customer reviews to help inform your decision. For those who prefer a more hands-on experience, specialized camera stores can offer expert advice and allow you to physically test different models, though their prices might sometimes be slightly higher.
When buying, always verify the seller’s authenticity, especially on marketplace sites. Prioritize retailers with clear warranty policies and easy return procedures in case the product doesn’t meet your expectations or has an unforeseen issue. While the initial price is a key factor for budget shopping, the peace of mind offered by good customer service and robust warranty coverage is invaluable.
Buying Guide: Expert Advice for Budget Gimbals
Choosing the perfect budget gimbal for your mirrorless camera can feel overwhelming with so many options available. As someone who has spent over a decade working with Camera Stabilizers, I can tell you that the best choice isn’t always the most expensive one. It’s the one that perfectly aligns with your specific needs and workflow.
First and foremost, clearly define your needs and shooting style. Are you primarily a travel vlogger needing ultimate portability, or do you shoot more controlled, cinematic sequences where precise control matters most? Your answer will help you prioritize features like payload capacity, advanced tracking, or ergonomic design. Don’t overspend on features you won’t use.
Next, read product reviews and comparisons diligently. Look for reviews from mirrorless camera users with setups similar to yours. Pay close attention to feedback regarding balancing ease, real-world battery life, and the gimbal’s performance under dynamic movement. YouTube reviews can be particularly insightful as they often demonstrate the gimbal in action.
Finally, always inquire about warranty and customer support. Even the best equipment can sometimes encounter issues. A strong warranty and accessible customer service can save you a lot of headaches and ensure your investment is protected.
“A great budget gimbal isn’t just about saving money; it’s about smart investment. The right stabilizer empowers you to tell your story without compromise, proving that professional quality is within everyone’s reach.” – Admin, StabilizerPro.com, Camera Stabilization Specialist
Frequently Asked Questions
Can a budget gimbal truly stabilize a mirrorless camera effectively?
Absolutely! Modern budget gimbals, especially those under $300, employ sophisticated 3-axis stabilization technology and powerful motors that can effectively smooth out footage from most mirrorless cameras, delivering remarkably professional results. The key is to select a gimbal with adequate payload capacity for your specific camera and lens setup.
What payload capacity should I look for in a budget gimbal for my mirrorless camera?
For most mirrorless camera bodies combined with a standard prime or lighter zoom lens, a gimbal with a payload capacity of 2 kg (4.4 lbs) to 2.5 kg (5.5 lbs) will be sufficient. Always check the combined weight of your camera and primary lens to ensure it falls within the gimbal’s recommended limits.
Are gimbals under $300 good for professional work?
While they may lack some advanced features or the heavy-duty payload capacity of high-end professional gimbals, many budget gimbals are perfectly capable of producing professional-grade stabilized footage for independent filmmakers, content creators, and videographers. Their performance is often more than adequate for vlogs, social media content, event coverage, and even short films, especially when paired with good shooting techniques.