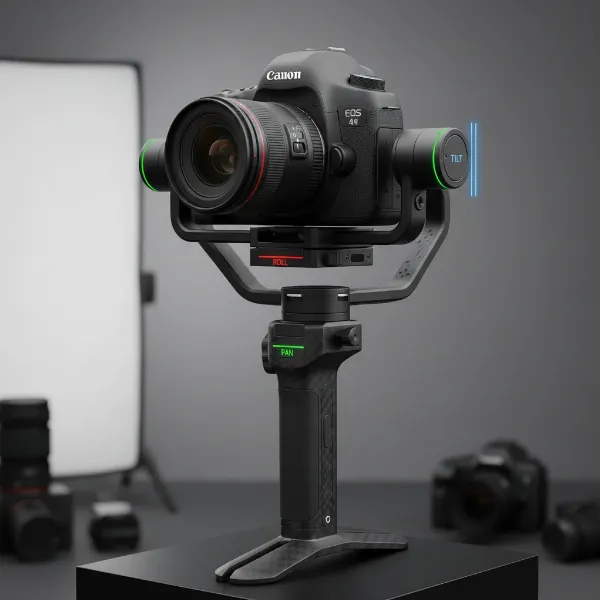
In the fast-paced world of social media, capturing buttery-smooth vertical video is no longer a luxury – it’s a necessity for anyone aiming to stand out on platforms like TikTok and Instagram Reels. Shaky footage can instantly deter viewers, but with the right camera stabilizer and setup, you can transform your content from amateur to professional-grade. This comprehensive guide will walk you through everything you need to know about setting up your gimbal for stunning vertical video, ensuring your stories flow seamlessly and captivate your audience.
What is a Camera Stabilizer, and Why Do You Need It?
A camera stabilizer, often a gimbal, is an essential tool designed to keep your camera level and smooth, eliminating unwanted shakes and vibrations from your footage. By counteracting your movements, it allows you to walk, run, or pan with your camera while maintaining a professional, cinematic look. This stability is crucial for dynamic social media content, where fluid motion keeps viewers engaged.
While the term “camera stabilizer” can refer to various tools, including traditional Steadicams and sliders, gimbals are the most popular choice for content creators due to their versatility and ease of use. A gimbal is an electronically controlled device that uses motors and intelligent sensors to keep your camera stable across three axes (pan, tilt, and roll). This sophisticated technology ensures your camera remains steady even when you’re in motion, delivering exceptionally smooth video that electronic image stabilization (EIS) alone often cannot match.
The benefits of using a gimbal for your vertical videos are numerous:
- Professional Smoothness: Achieve cinematic-quality motion that instantly elevates your content.
- Reduced Shake: Say goodbye to distracting jitters, making your videos more enjoyable to watch.
- Enhanced Storytelling: Smooth footage allows your narrative to take center stage without visual distractions.
- Dynamic Shots: Execute complex movements like tracking shots or crane-like motions with ease.
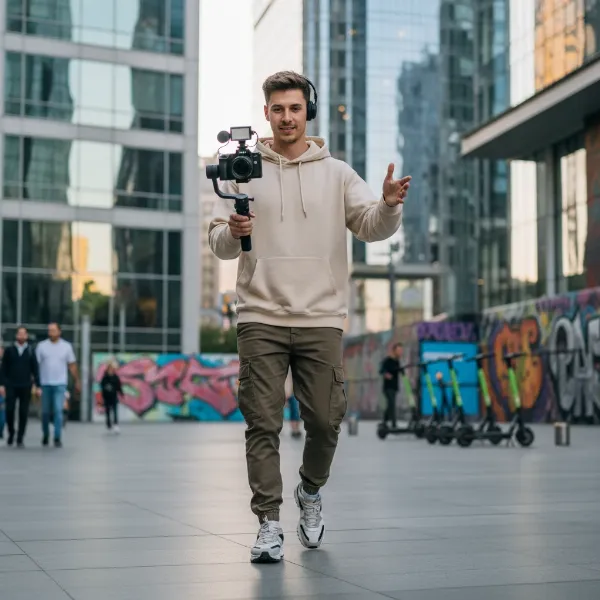 A content creator using a camera gimbal to film smooth vertical video for social media, focusing on stability and clarity
Factors to Consider When Choosing a Camera Gimbal for Vertical Video
Selecting the perfect gimbal involves more than just picking the newest model. Your specific needs, equipment, and filming style should guide your decision.
Camera Type
The type of camera you use is the primary determinant for your gimbal choice. Gimbals are designed with varying payload capacities and mounting systems.
- DSLR/Mirrorless Cameras: If you’re using a professional DSLR or mirrorless camera, you’ll need a robust gimbal capable of supporting its weight, along with any attached lenses. Look for models like the DJI RS series or Zhiyun Crane series, which offer substantial payload capacities and precise balancing mechanisms.
- Action Cameras (GoPro, DJI Osmo Action): These smaller, lighter cameras require more compact and often waterproof gimbals. Some pocket gimbals, like the Xtra Muse, integrate the camera directly.
- Smartphones: For mobile creators, smartphone gimbals are lightweight, affordable, and incredibly portable. They often come with dedicated apps that unlock advanced shooting modes.
|
Our Picks for the Best Camera Stabilizer in 2026
As an Amazon Associate I earn from qualifying purchases.
|
||
| Num | Product | Action |
|---|---|---|
| 1 | Zeadio Video Action Stabilizing Handle Grip Handheld Stabilizer with Cold-Shoe Mount for All DSLR Camera Camcorder |

|
| 2 | DJI RS 3 Mini, 3-Axis Gimbal Stabilizer for Cameras Canon/Sony/Panasonic/Nikon/Fujifilm, 2 kg (4.4 lbs) Tested Payload, Camera Gimbal with Native Vertical Shooting, Black |
|
| 3 | DJI Osmo Mobile 7P Gimbal Stabilizer for iPhone, Android, Native Tracking, Lighting, 3-Axis Phone Gimbal, Quick Launch, One-Tap Edit, Built-in Extension Rod & Tripod, 10hrs Use, Phone Charging |
|
| 4 | DJI Osmo Mobile 7 Gimbal Stabilizer for iPhone, Android, Built-in Tripod, Portable Stabilizer for iPhone, Selfie Stick, 3-Axis Phone Gimbal, ActiveTrack 7.0, One-Tap Edit, 10hrs Use, Phone Charging |
|
| 5 | FeiyuTech SCORP 2 Gimbal Stabilizer for DSLR and Mirrorless Camera, Integrated Al Tracking Sensor, 3-Axis Camera Stabilizer for Sony Canon Panasonic Nikon, 2.5kg Payload Touch Screen Vertical Shooting |
|
| 6 | 3-Shoe DSLR/Mirrorless/Action Camera Camcorder Phone Stabilizer Expansion Cage Mount Moviemaking Holder Rig YouTube Tiktok Vlogging Video Kit Compatible with GoPro Canon Nikon Sony iPhone Android |
|
| 7 | DJI Osmo Mobile 8 Advanced Tracking Combo Gimbal Stabilizer for Phone, AI Native Tracking with Audio & Lighting, 360° Pan Rotation, Built-in Extension Rod & Tripod, 10h Battery, Extension Rod |
|
| 8 | FeiyuTech SCORP 3 Gimbal Stabilizer for Camera, Built-in AI Tracking Sensor & Detachable Remote Control, 3.5KG Payload Camera Stabilizer with Touch Screen, Vertical Shooting |
|
| 9 | ZHIYUN CINEPEER Weebill 3E [Official], 3-Axis Lightweight Gimbal Stabilizer for DSLR & Mirrorless Camera Canon/Sony/Panasonic/Nikon, 3KG Payload, Native Vertical Shooting, Bluetooth Shutter Control |
|
| 10 | Zeadio Camera Stabilizer Kit, All-in-One Handheld Stabilizer with LED Video Light, Microphone, Phone Holder & Action Camera adaper, Fits for All Camera, DSLR, Action Camera and All Smartphones |
|
Budget
Gimbals range significantly in price, reflecting their features, build quality, and payload capacity.
- Entry-Level (Budget-Friendly): For casual users or those just starting, smartphone gimbals or older, simpler models for mirrorless cameras offer excellent value. They provide fundamental stabilization without breaking the bank.
- Mid-Range: These gimbals offer a good balance of features, payload capacity, and price, suitable for serious hobbyists or semi-professional content creators. Many popular mirrorless gimbals fall into this category.
- High-End (Professional): Designed for heavy camera setups and cinema lenses, these gimbals offer advanced features, superior motor strength, and often quicker setup times for vertical shooting. They represent a significant investment but deliver top-tier performance and reliability.
Purpose of Use
Your filming intentions will greatly influence the best gimbal for you.
- Travel Vlogging/Daily Content: Portability and quick setup are key. Compact and lightweight gimbals that are easy to pack and deploy, like the DJI RS 3 Mini, are ideal.
- Sports/Action: You’ll need a gimbal that can handle dynamic movements and potentially adverse conditions. Action camera gimbals or robust mirrorless gimbals with good follow modes are suitable.
- Professional Filmmaking/Short Films: High payload capacity, precise control, and extensive accessory support (like follow focus systems) are crucial. Gimbals designed for heavier camera rigs will be necessary.
Weight and Size
The physical characteristics of your gimbal impact its usability, especially for vertical video content that often requires dynamic, handheld movements.
- Portability: If you’re constantly on the go, a lightweight and foldable gimbal is a game-changer. Consider how easily it fits into your bag and how comfortable it is to carry for extended periods.
- Payload Capacity: Ensure the gimbal can comfortably support the total weight of your camera, lens, and any accessories (microphone, external monitor, L-bracket). Overloading a gimbal can lead to poor performance and motor strain. The DJI RS 4 Pro, for instance, boasts a hearty payload of up to 10 pounds.
Comparing Vertical Video Setup Methods on Gimbals
While all gimbals aim to stabilize, their approaches to vertical video can vary significantly. Understanding these methods is key to choosing the right tool and mastering its setup.
| Feature | Native Vertical Mode Gimbals (e.g., DJI RS 4 Pro) | L-Bracket/Cage Method (for gimbals without native mode) | Smartphone Gimbals (e.g., Aochuan) |
|---|---|---|---|
| Ease of Setup | Extremely fast, often a quick switch or button press. | More involved; requires attaching extra hardware. | Very easy; often a physical rotation or app setting. |
| Balancing | Designed for easy re-balancing in vertical orientation. | Can be challenging; often requires counterweights. | Generally simple, as smartphone weight is predictable. |
| Screen Visibility | Optimized for clear screen visibility in vertical. | May obstruct screen, especially with larger cameras. | Excellent, as phone screens are naturally oriented. |
| Hardware Needed | Gimbal only (or minimal proprietary accessories). | L-bracket or camera cage, potentially counterweights. | Gimbal only. |
| Compatibility | Best with specific camera models supported by the gimbal. | Universal for most cameras, depends on cage/L-bracket. | Universal for most smartphones. |
| Best For | Rapid switching between horizontal and vertical for diverse content needs. | Adapting older gimbals or achieving specific camera positions. | Casual creators, social media, travel, everyday vlogging. |
Native Vertical Mode: Newer gimbals, such as the DJI RS 4 Pro, DJI RS 3 Mini, and Zhiyun CRANE 4, offer a “native vertical shooting mode.” This feature allows you to quickly switch your camera’s orientation from horizontal to vertical, often with a simple button press or physical re-orientation of the quick-release plate. This is ideal for creators who frequently switch between formats for platforms like YouTube (horizontal) and TikTok/Reels (vertical) without time-consuming re-balancing. The DJI RS 4 Pro can even switch in as little as 10 seconds.
L-Bracket or Camera Cage Method: For gimbals that don’t have a built-in vertical mode, or if you prefer a more robust mounting solution, an L-bracket or camera cage is an excellent alternative. An L-bracket attaches to the bottom of your camera and provides a vertical mounting point for the gimbal’s quick-release plate. This allows you to mount your camera vertically on the standard horizontal plate. While effective, this method often requires careful balancing and sometimes the addition of counterweights to ensure proper stability.
Top Camera Gimbals for Vertical Video Today
Choosing the right gimbal can significantly enhance your vertical video production. Here are some of the top-rated gimbals that excel in this area.
DJI RS 4 Pro – Professional Powerhouse with Rapid Vertical Switching
The DJI RS 4 Pro is DJI’s flagship gimbal, designed for professional filmmakers and content creators who demand both performance and versatility. It boasts a substantial payload capacity of up to 10 pounds, allowing it to handle heavy camera setups and cinema lenses. Its standout feature for vertical video is the ability to switch between horizontal and vertical shooting modes in just seconds, making it a game-changer for fast-paced productions like wedding filmmaking or dynamic social content.
- Pros: High payload, fast vertical mode switching, automated axis locks, robust build, updated ActiveTrack Pro.
- Cons: Higher price point, heavier than smaller models.
- Ideal For: Professional videographers, commercial projects, creators using heavier mirrorless or cinema cameras who need quick transitions.
DJI RS 3 Mini – Compact & Capable for On-the-Go Creators
The DJI RS 3 Mini is the lighter, more compact sibling, perfect for content creators who prioritize portability without compromising on stabilization. Weighing only 1.9 pounds and supporting a payload of 4.4 pounds, it’s an excellent option for smaller camera setups and travel. Its horizontal and vertical shooting modes make it a versatile choice for capturing content across various social media platforms.
- Pros: Lightweight, highly portable, good battery life (up to 10 hours), native vertical mode, budget-friendly.
- Cons: Lower payload capacity compared to Pro models.
- Ideal For: Vloggers, travel creators, smartphone users transitioning to mirrorless, those with smaller cameras (e.g., Sony a6000 series, Canon M series).
Zhiyun CRANE 4 – Heavy-Duty Performance with Smart Balancing
Zhiyun’s CRANE 4 is an impressive flagship gimbal known for its incredible load capacity of 13.2 pounds, making it suitable for even the most rigged-out camera setups. It features useful indicator lights on the motors that signal whether your setup is balanced, helping prevent motor strain. Like the DJI models, it supports both horizontal and vertical shooting, offering flexibility for diverse content.
- Pros: Very high payload capacity, smart balancing indicators, flexible wrist rest, built-in fill light.
- Cons: Heavier and larger than other options.
- Ideal For: Videographers using heavier professional cameras and lenses, those needing to rig multiple accessories, creators who value precise balancing cues.
“The shift to vertical video isn’t just a trend; it’s a fundamental change in how we consume media. Mastering your gimbal for this format is no longer optional, it’s essential for staying relevant.” – Admin of StabilizerPro.com, Camera Stabilizer Expert
How to Set Up and Balance Your Gimbal for Vertical Video
Proper setup and balancing are paramount for achieving smooth vertical footage. While specific steps may vary slightly by gimbal model, the core principles remain the same.
1. Mount Your Camera
- Native Vertical Mode: If your gimbal has a dedicated vertical mode (like the DJI RS series or Zhiyun Weebill 2), simply attach your camera to the quick-release plate as usual. Then, activate the vertical mode through the gimbal’s menu or a dedicated button. Some gimbals automatically reorient, while others might require a quick physical adjustment of the camera on the plate.
- L-Bracket/Cage: If you’re using an L-bracket or camera cage, attach it to your camera first. Then, mount the L-bracket vertically onto the gimbal’s quick-release plate. Ensure it’s securely fastened.
2. Rough Balance (Before Powering On)
This critical step prevents motor strain and ensures optimal performance.
- Unlock All Axes: Release the locks on the pan, tilt, and roll axes.
- Tilt Axis (Forward/Backward): Adjust the plate forward or backward until the camera doesn’t tip when facing straight ahead.
- Roll Axis (Left/Right): Slide the camera left or right until it remains level without rolling to one side.
- Pan Axis (Rotation): Adjust the gimbal arm so the camera stays centered when you rotate the pan axis.
3. Fine-Tuning and Motor Calibration
- Power On: Once roughly balanced, power on your gimbal.
- Automatic Calibration: Most modern gimbals have an auto-tune or motor calibration feature. Run this function to allow the gimbal to fine-tune its motor strength to your camera’s weight. This is crucial for optimal stabilization.
- Check for Drifts: Gently move the gimbal. The camera should remain stable and centered. If it drifts, perform small adjustments on the corresponding axis and recalibrate.
Tips for Smooth Vertical Filming
- Master the Walk: Practice the “ninja walk” or “Gimbal walk” (bending your knees slightly) to absorb impacts and further smooth out your movements.
- Use ActiveTrack/Follow Modes: Leverage your gimbal’s intelligent tracking features to keep your subject in frame, especially for dynamic vertical content.
- Monitor Your Shot: If your camera’s screen is obstructed, use an external monitor or a smartphone app connected to your camera for real-time framing.
- Experiment with Angles: Don’t just shoot at eye level. Use low angles for dramatic effect or high angles to capture more context, remembering that many native vertical modes might initially orient the camera upwards, requiring an underslung hold.
Cleaning and Maintenance
Regular maintenance extends your gimbal’s lifespan and ensures consistent performance.
- Clean Contacts: Periodically clean the battery contacts and any electronic connectors with a dry, lint-free cloth.
- Store Properly: When not in use, store your gimbal in its designated case to protect it from dust and physical damage.
- Charge Batteries: Keep your batteries charged, but avoid overcharging or letting them completely drain for extended periods.
Where to Buy Your Next Camera Gimbal
Finding the right gimbal is just the first step; knowing where to purchase it from reputable sources is equally important.
- Specialized Camera Stores: Retailers like B&H Photo Video, Adorama, or local camera shops offer a wide selection, knowledgeable staff, and often hands-on demonstrations. These stores provide excellent customer service and product expertise.
- Online Marketplaces: Major e-commerce sites like Amazon, Best Buy, or the official stores of brands like DJI and Zhiyun are convenient options. Always check seller ratings, product reviews, and return policies.
- Manufacturer Websites: Buying directly from the manufacturer often guarantees authenticity, direct warranty support, and access to the latest models and firmware updates.
When making a purchase, always verify the warranty policy and return/exchange options. This ensures peace of mind and protection for your investment.
Buying Guide: Expert Advice for Choosing Your Vertical Video Gimbal
As a technician with over a decade of experience in Camera Stabilizers, I’ve seen countless setups and learned what truly makes a difference. Here’s my pro advice:
- Define Your Workflow First: Before looking at features, visualize your typical shooting scenario. Do you need to switch between horizontal and vertical constantly? Is compactness more important than payload? Your workflow dictates the best fit.
- Prioritize Balance Over Features: A gimbal with a thousand features is useless if it can’t be balanced quickly and effectively with your camera. Look for designs that make balancing intuitive, whether through native vertical modes or well-designed quick-release systems.
- Read User Reviews, Not Just Specs: While specifications are important, real-world user experiences often highlight practical issues or unexpected benefits that spec sheets miss. Pay attention to comments about balancing difficulty, battery life in real use, and app stability.
- Don’t Fear the L-Bracket: If your ideal gimbal doesn’t have a native vertical mode, don’t write it off. A good L-bracket or cage can be a very effective and robust solution, often more stable for heavier setups than some built-in mechanisms. Just be prepared for a slightly longer setup time.
Frequently Asked Questions
What is the ideal aspect ratio for vertical video on TikTok and Reels?
The ideal aspect ratio for vertical video on platforms like TikTok and Instagram Reels is 9:16. This full-screen portrait orientation maximizes screen real estate and provides an immersive viewing experience for mobile users.
Can I use a smartphone gimbal to shoot vertical videos with a mirrorless camera?
No, a smartphone gimbal is specifically designed for the weight and size of smartphones. It will not have the motor strength or mounting compatibility to safely and effectively stabilize a heavier mirrorless camera. Always match your gimbal’s payload capacity and mounting system to your camera.
How do I know if my gimbal supports native vertical shooting?
Check your gimbal’s specifications and user manual. Many newer models explicitly list “native vertical shooting,” “portrait mode,” or “quick switch to vertical” as a key feature. If it’s not mentioned, you’ll likely need an L-bracket or camera cage for vertical orientation.
Is it harder to balance a gimbal in vertical mode?
It can be slightly more challenging, especially if using an L-bracket, as the weight distribution changes. However, with practice and careful adjustment of each axis, achieving a perfect balance is entirely possible. Many modern gimbals with native vertical modes simplify this process significantly.
Conclusion
Mastering vertical video with a camera gimbal is a powerful way to elevate your content and captivate audiences on TikTok, Instagram Reels, and beyond. By understanding the different methods of vertical setup, choosing a gimbal that aligns with your needs, and meticulously balancing your equipment, you unlock a world of smooth, professional-looking footage. Remember, the goal is to tell your story seamlessly, and a stable camera is your most reliable narrator. So, what stunning vertical story will you tell next?